
Customize and Extend
In our previous tutorials, we started a developer loop and added two interfaces (wasi:logging and wasi:keyvalue) to our application. The wash dev process satisfied our application's capability requirements automatically, so we could move quickly and focus on code.
Now we'll learn how to:
- Explore capabilities available for wasmCloud applications
- Extend our application by plugging in capability requirements
This tutorial assumes you're following directly from the previous steps. Make sure to complete Quickstart and Add Features first.
Choose a capability
As we learned in the previous tutorial, components can make use of capabilities for common requirements like key-value storage or logging.
If we want to learn about a capability, we can browse the Capability Catalog.
Each capability in the catalog consists of an interface and one or more capability providers.
- Interfaces are the language-agnostic APIs we use to represent a capability in our code. They are defined using the WebAssembly Interface Type (WIT) interface description language in simple
.witfiles. - Capability providers are reusable executable plugins that deliver functionality described by an interface. Where interfaces are typically very general (i.e. key-value storage), providers are tool- or vendor-specific implementations (i.e. Redis, Vault).
Here's the Capability Catalog listing for Key-Value Storage:
| NAME | INTERFACE | PROVIDERS |
|---|---|---|
| Key-Value Storage | wasi:keyvalue | Redis, NATS, Vault |
Here we find the interface, wasi:keyvalue, and several capability providers including Redis.
WASI stands for WebAssembly System Interface (WASI), a group of standards-track APIs governed by the WASI Subgroup in the W3C WebAssembly Community Group. wasmCloud uses WASI interfaces to define capabilities in a standards-based way that avoids vendor lock-in.For more on interfaces and WASI, see the Interfaces page in our Developer Guide.
Select a capability provider
Interfaces are backed by capability providers, which are both reusable and swappable.
When we ran wash dev, we added capabilities—but we never specified tools or libraries for key-value storage and logging. wash dev provisioned appropriate capability providers automatically. How? Because components encode their dependencies in the binaries themselves, wash dev was able to detect the requirement at runtime and start an appropriate providers to satisfy the requirements for an HTTP server, key-value store, and logger.
So what was actually running? In this case, wash dev used:
- The wasmCloud
httpserverprovider - The wasmCloud built-in logger
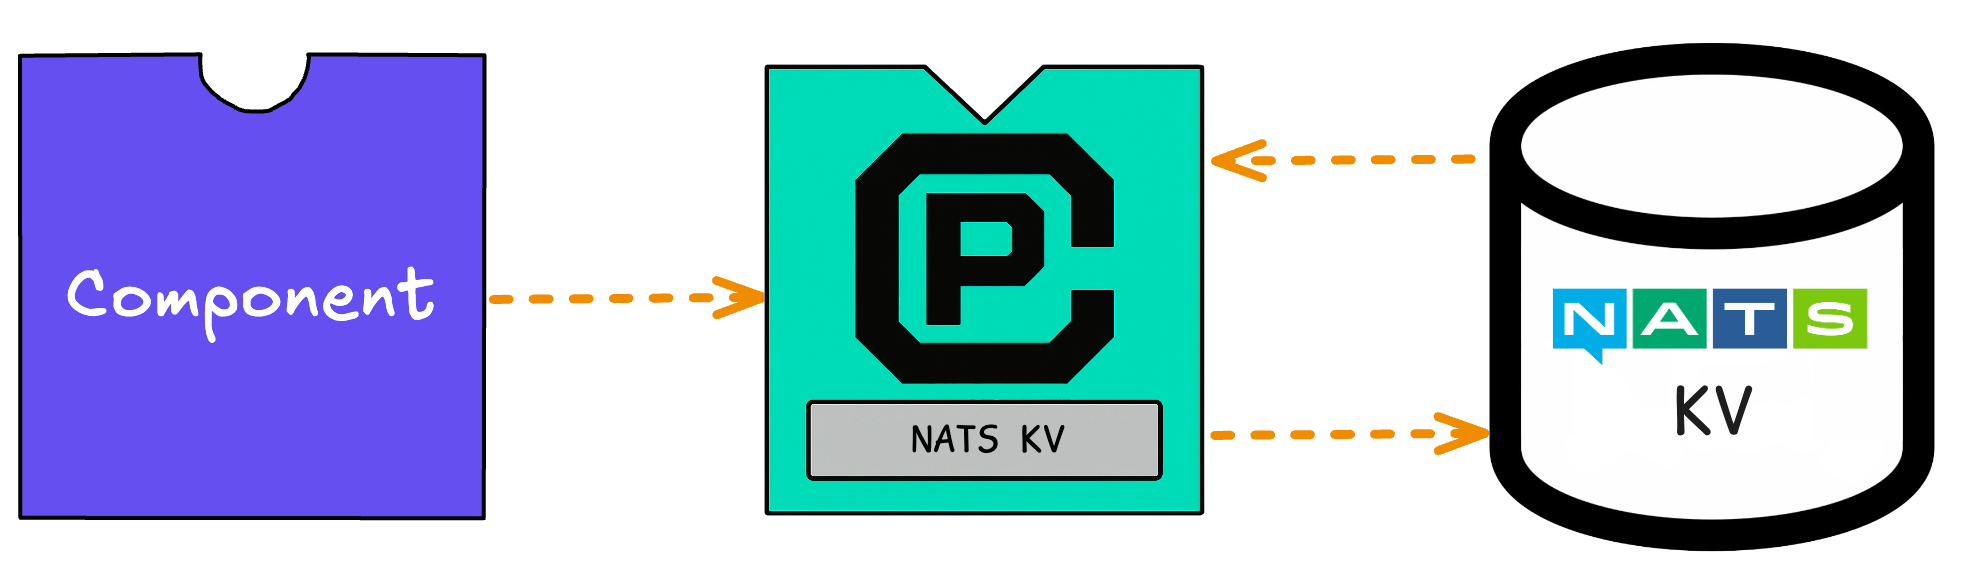
- The NATS
keyvalueprovider (Convenient since NATS is already part of the wasmCloud stack)
As far as the key-value capability is concerned, the application looks like this:
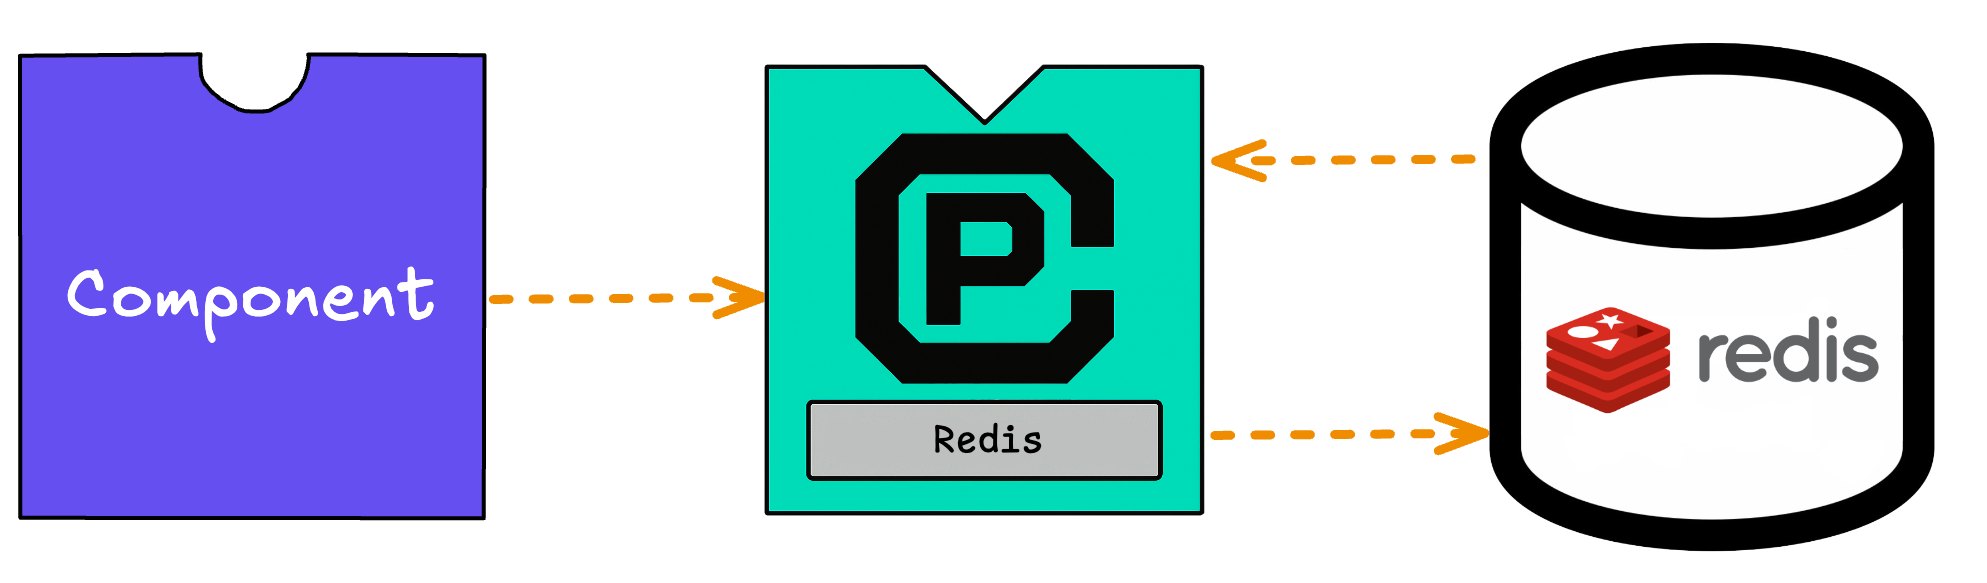
Now we'll swap out a different key-value storage provider. We'll use the Redis provider, which will only require us to have redis-server or Docker installed. The Redis provider will mediate a connection to the Redis server, which is running external to wasmCloud.
- Local Redis Server
- Docker
Install and launch a local Redis server in the background:
redis-server &Launch a Redis container in the background.
docker run -d --name redis -p 6379:6379 redisOn the wasmCloud GitHub Packages page, we can find a keyvalue-redis image (also linked in the Capability Catalog) that enables us to deploy the provider:
ghcr.io/wasmcloud/keyvalue-redis:0.28.2The wasmCloud ecosystem uses the OCI image specification to package components and providers—these component and provider images are not container images, but conform to OCI standards and may be stored on any OCI-compatible registry. You can learn more about wasmCloud packaging on the Packaging page.
Deploying the application with a key-value provider
We can still use wash dev—we'll just need to override the wasi:keyvalue capability dependency with the Redis provider. Open up the wasmcloud.toml configuration file and add the following lines to the end:
name = "http-hello-world"
version = "0.1.0"
language = "<your_language>"
type = "component"

[component]
wasm_target = "wasm32-wasip2"

[[dev.overrides.imports]]
interface_spec = "wasi:keyvalue@0.2.0-draft"
image_ref = "ghcr.io/wasmcloud/keyvalue-redis:0.28.2"
config = { values = { url = "redis://127.0.0.1:6379" } }
Now the wash dev process will deploy the Redis provider (rather than the default NATS-KV provider) to satisfy your component's dependency on a keyvalue capability.
Save wasmcloud.toml. If wash dev is still running from the previous tutorial, make sure to stop it with CTRL+C and restart the developer loop.
wash devOnce the application is Deployed, we can curl the application like before:
curl 'localhost:8000?name=Bob'Hello x1, Bob!curl 'localhost:8000?name=Bob'Hello x2, Bob!curl 'localhost:8000?name=Alice'Hello x1, Alice!Note that our increments are starting over again—after all, we swapped out the dev key-value store for a totally different one!
When you're done with development, you can stop wash dev with CTRL+C.
Stop your Redis server:
- Local Redis Server
- Docker
Enter CTRL+C.
redis-cli shutdowndocker stop redisLog files
If you encounter any problems, wasmCloud log files may contain useful error messages, and it's good to know how to find them. wash dev will create a unique log file for each session and will output the location of that log in the startup text:
...
🔧 Successfully started wasmCloud instance
✅ Successfully started host, logs writing to /Users/wasmcloud/.wash/dev/<session_id>/wasmcloud.log
...
Next steps
In this tutorial, we learned how to explore capabilities, swap out a provider, and deploy an application to a wasmCloud environment.
- For more information on defining application manifests, see our documentation on the wasmCloud application deployment manager.
- For more information on capabilities, such as how to create new interfaces and providers, see the Developer Guide pages for providers and interfaces.
You can continue to build on this application by adding more features, or you can explore additional first-party providers in the Capability Catalog to get an idea of what is possible with wasmCloud.
The next page demonstrates scaling via application manifest and gives a high-level overview of why this application that you've built already eliminates complexity and pain that developers often face when building applications for the cloud.